Configuring a Profile
Patterns, workspace, and extension preferences can be deployed to a group of employees through a Profile. An IT Security team will often create a single profile for "Everyone" in the organization and then layer additional profiles for specific groups of employees that require additional policy or configurations.
Getting Started
Access the Profiles page from the console menu. Within a specific profile, you will have various configurations, including which Groups the profile applies to, which Patterns to apply, Extensions to block or allow, as well as the browser homepage and new tab behavior through a workspace. To create a profile, click Create Profile in the top-right side of the page. This will bring you into the Profile Editor page.
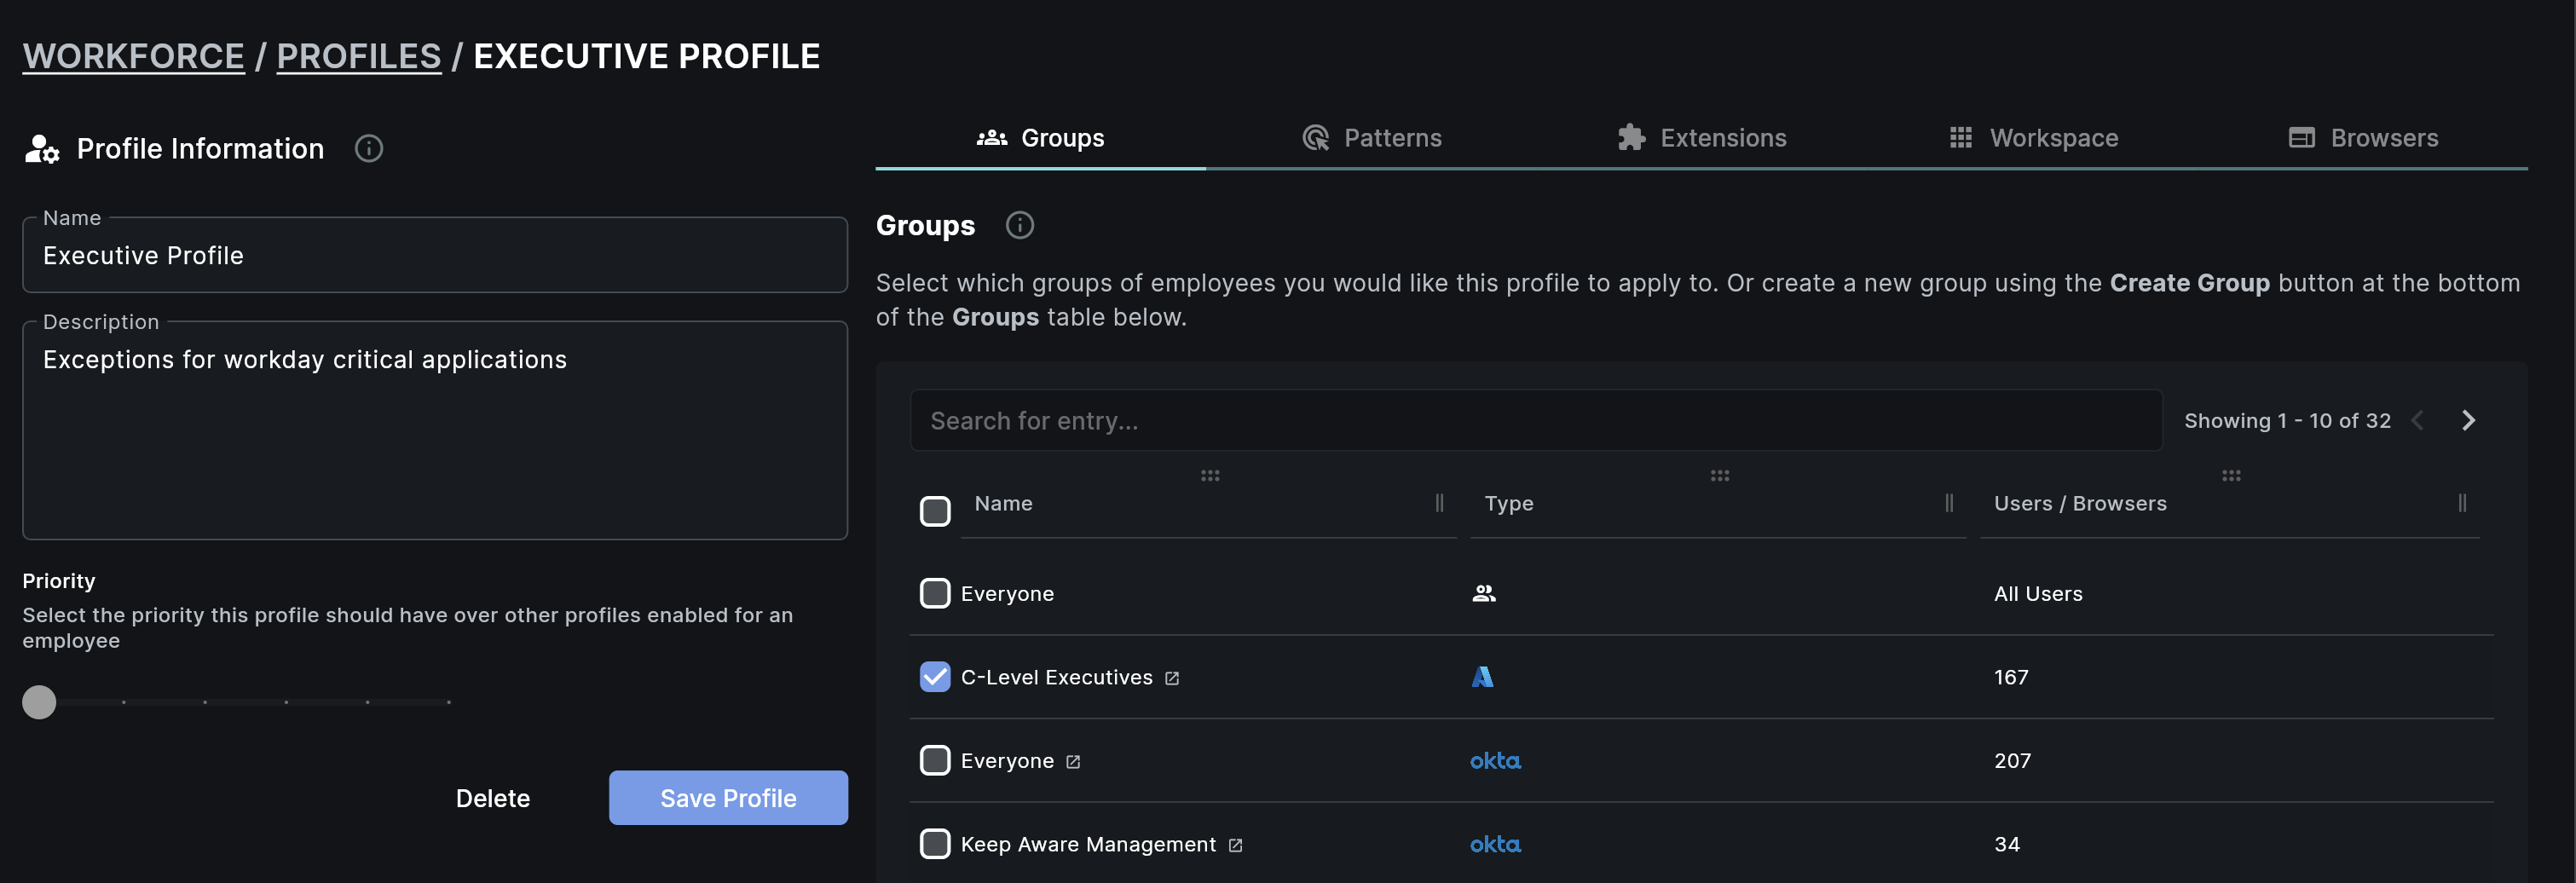 Image: Profile Editor
Groups
Groups enable the application of profiles to specific users, devices or browsers, offering detailed control over browser configurations and extensions. This feature supports integration with user groups from directory services such as Entra ID, allowing you to manage settings for all employees, select individuals, or their respective browsers.
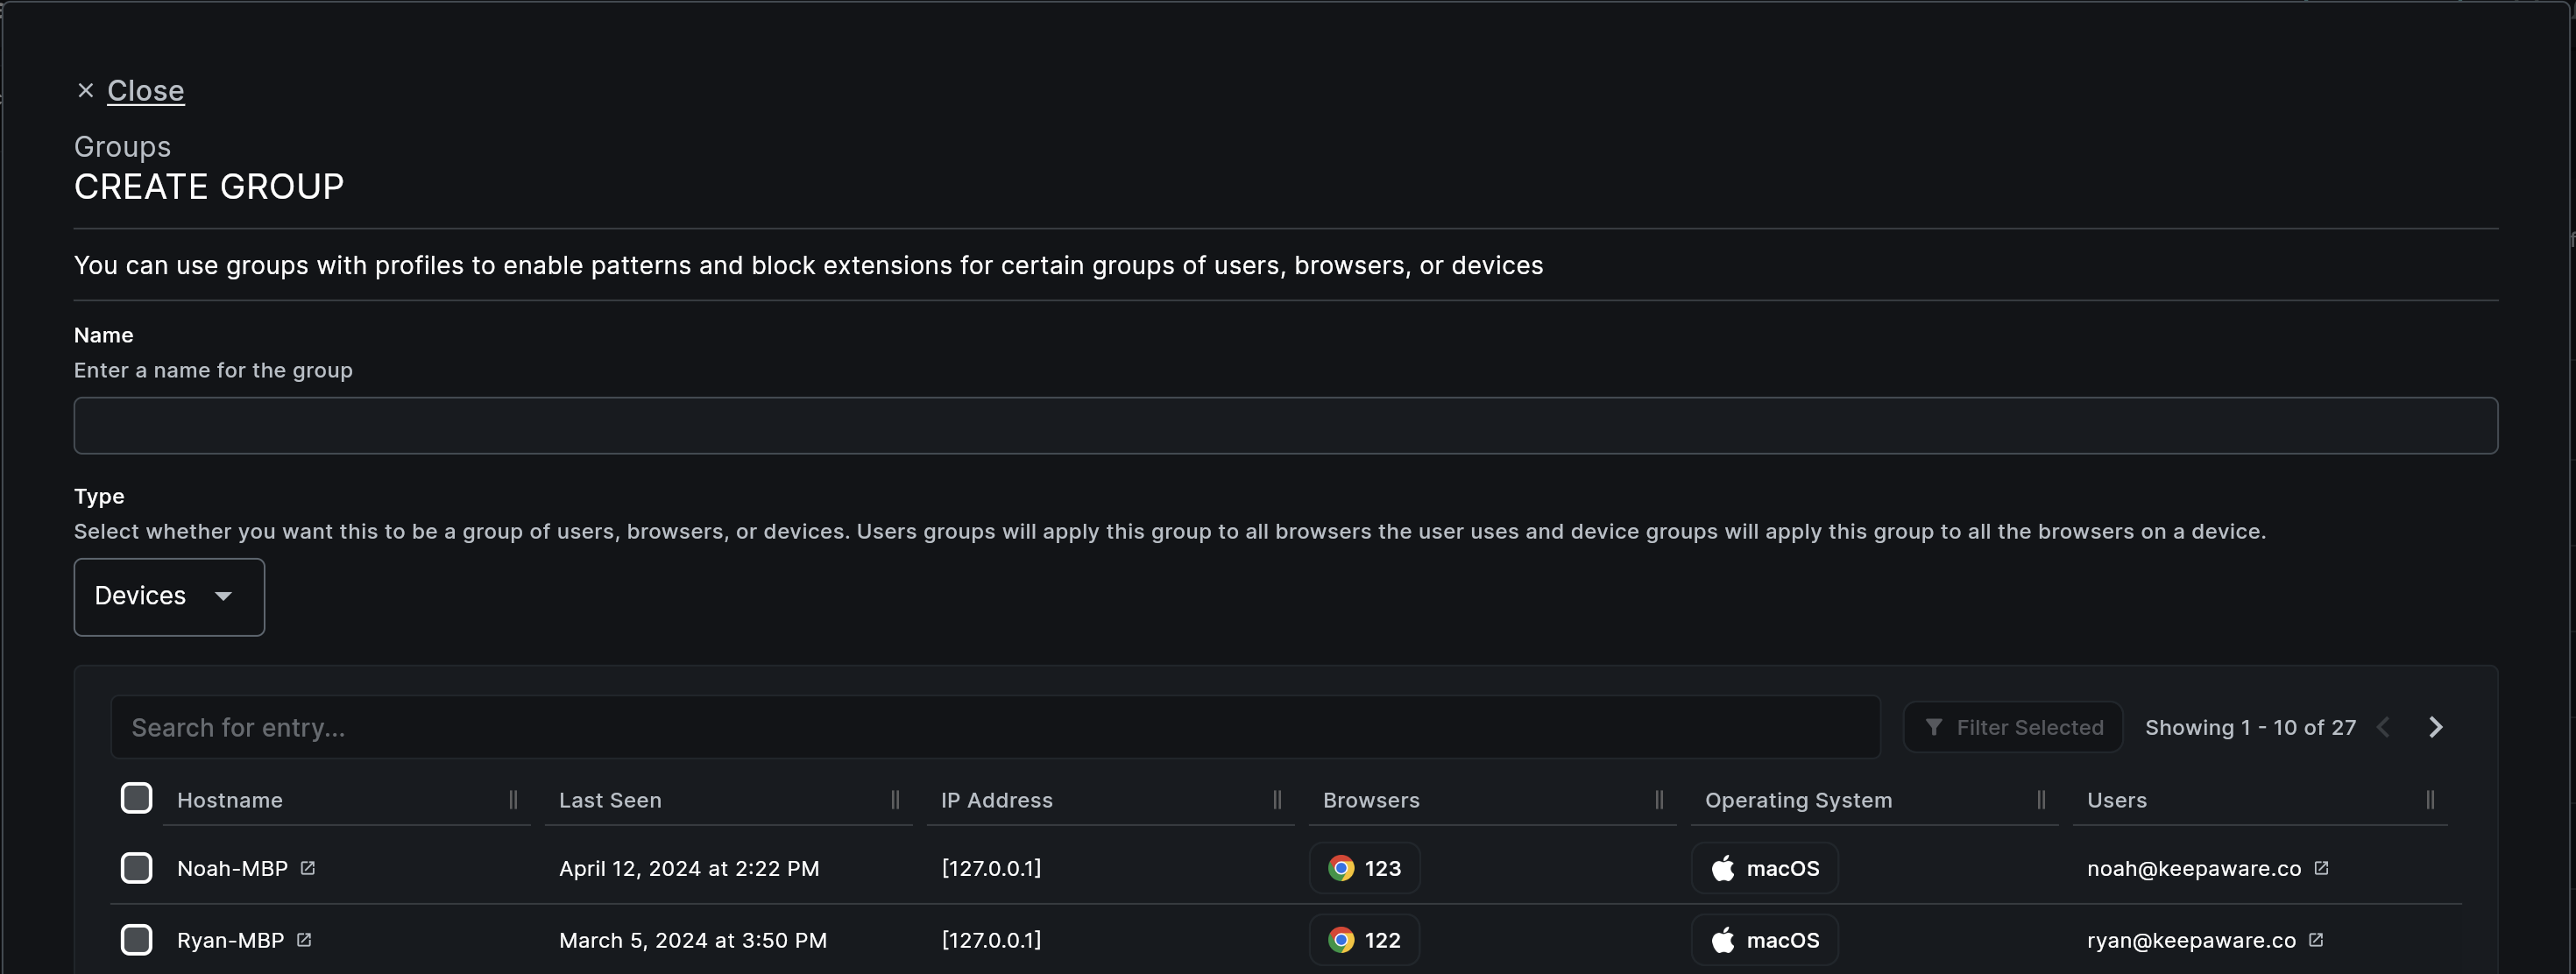 Image: Create Group Modal
Adding, Creating and Editing Groups
Groups can be created from the Groups tab when editing or creating a profile. You can create a new group clicking the Create Group button located at the bottom of the groups table or select a group in the table to edit. This will open a modal which will allow you to configure:
- The name of the group
- The type of asset a group is applied to such as User, Browser, or Device
- The assets in the group
Apply a profile to all employees
When using profiles you may want to create default profile that applies to everyone. To do that just select the group named Everyone and save the group. That profile will now be enabled for all employees.
Types of Groups
When creating groups you have the option to create a group of Users, Browsers, Devices or Directories To learn more, visit the Integrations User Directory section.
Users
A user is an individual person in your environment, and that person can have many browsers linked to them over time. If you create a group of users and apply that group to a profile, it would apply that profile to all the browsers they use, and any new browsers they may use in the future.
Browsers
Browsers target specific instances of the browsers in use by a user. For example, if a user has both Chrome and Firefox installed, by creating a browser group, you can have one profile for Chrome and one for Firefox.
Devices
A user can have multiple devices and each device can be linked to multiple browsers. By creating device groups, you can define configurations like you would with an MDM where, for example, you can apply one profile to work laptops and another to smartphones.
Directories
Directory groups are similar to user groups, but make use of integrations with your Entra ID, Okta or JumpCloud to easily apply policies to existing user groups. To learn more, visit the Integrations User Directory section.
Frequently Asked Questions
| Question | Answer |
|---|---|
| Can I apply multiple profiles to the same user? | Yes, a user can be targeted by more than one profile, all profile rules will apply in an additive or union approach. For example, if one profile blocks all extensions by default and another blocks specific extensions, all extensions will be blocked. The same is true for patterns applied to profiles. |
Examples
Restricting File Sharing Extensions for the Accounting Department
Scenario
The accounting department does not require file-sharing extensions in their workflow. Allowing such extensions could pose a security risk, as employees could be targeted to share sensitive payroll information.
Steps to Implement
- Create a profile under the name "Accounting".
- In the groups tab, select the group that contains the accounting department employees. For example, if you use the Entra ID Groups integration, it's likely you already have a group that you can import.
- In the extensions tab, select forbidden extensions for file sharing like P2P File Transfer.
- Select the option to Force Uninstall Extensions. This will prompt them to uninstall the extensions they currently have, or stop them from installing new ones.
- Click "Save Profile". The profile will be automatically deployed.
Result
Employees in the accounting department will no longer be able to download file sharing extensions. If they already have one, they will be prompted to uninstall it.