Set up Okta SSO to sign into the Keep Aware console.
Setting up Okta SSO
Requirements
- Access to the Keep Aware Console: Ensure you have valid login credentials and are logged in to the console.
- Administrator access to Okta: Confirm that you have the necessary permissions to configure SAML-Based Single-Sign-On in the Okta Admin portal.
Getting Started
Okta Application Setup
- Navigate to the Okta Admin Portal and go to the Applications tab.
- Click Create Application Integration.
- Set the application type to SAML 2.0.
General Settings
- App name:
Keep Aware Console
SAML Settings
- Name ID Format:
EmailAddress - Application Username:
Email
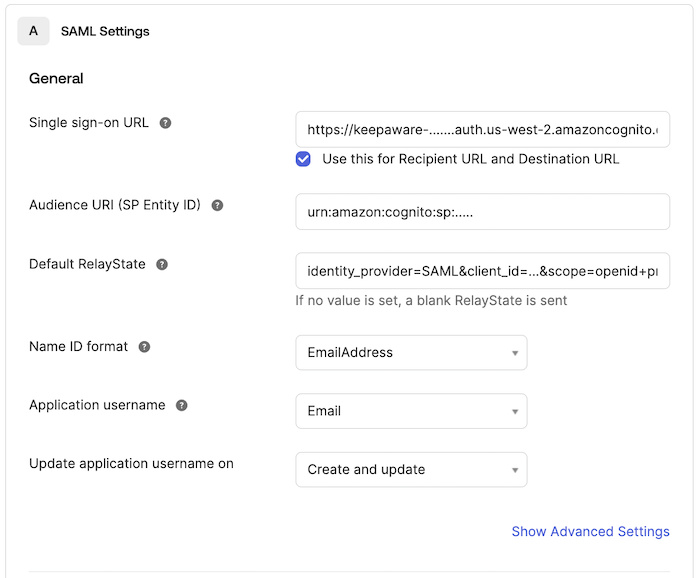
Attribute Statements (Optional)
- If you would like to specify an email mapping, create an attribute mapping for email in the Attribute Statements section.
- Group Attribute Statements: No configuration needed.
Setting up Okta SSO in the Keep Aware Console
- In the Keep Aware Console, click on the Integrations tab.
- Select SAML SSO and click Create New Integration.
Configure the following fields:
- SAML 2.0 Endpoint (Login URL): Your Okta Sign On URL.
- Issuer: Your Issuer URL from Okta, e.g.,
http://www.okta.com/….. - Public Certificate: The Signing Certificate from Okta. Only the base64 encoded certificate body is needed (exclude the
----BEGIN CERT...----END CERT...lines). - Email Attribute Mapping Key (Optional): If you configured an email mapping in Okta, specify the name of that attribute here.
Click Save to complete the setup.
Test the Integration
- Logout of the Keep Aware Console.
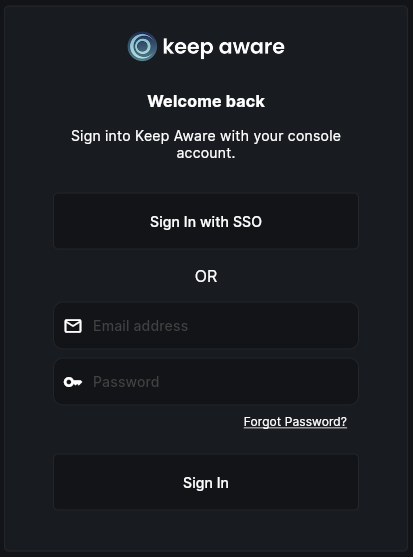
- Login with SSO: Enter your email on the login page. You should now see and select the Sign-in with SSO option. Or if you configured a Default Relay State you can login from the Okta Apps Dashboard via IDp-initiated SAML sign-in.
Support
Your Keep Aware account team can assist with the deployment of the Okta integration. Please reach out with any questions or schedule a call to walk through the deployment process together.